Thruster Cover for Nordic Tug 32
By
Al & Evelyn McKenney — Nordic Star, 32-178
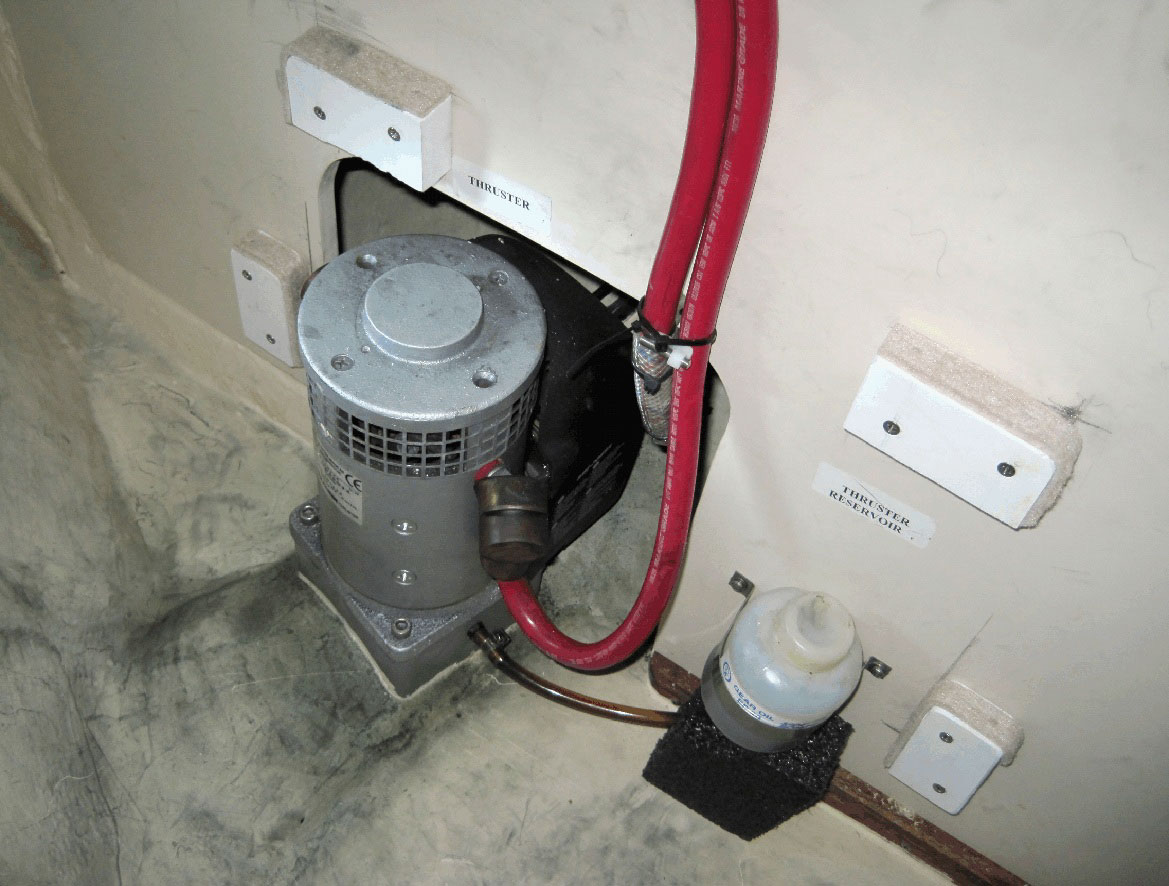
For those 32's with a starboard queen berth, there is good storage underneath for baggage, etc. There is an outboard space next to the hull which is difficult to access and with limited space. However, the other space, accessible from cabin deck, is quite useful.
There is a problem with this space, however: It is necessary to keep the stored items from falling on top of the thruster motor which not only needs circulating air for cooling, but also emits dark carbon from its brushes. Perhaps more important, it is necessary to keep the stored objects from knocking into the lubricant reservoir. This can spill the very viscous oil on the compartment deck, and what is unbelievably worse, on the clothing or whatever else is stored there. This is an event you never want to happen again - ever! I know!
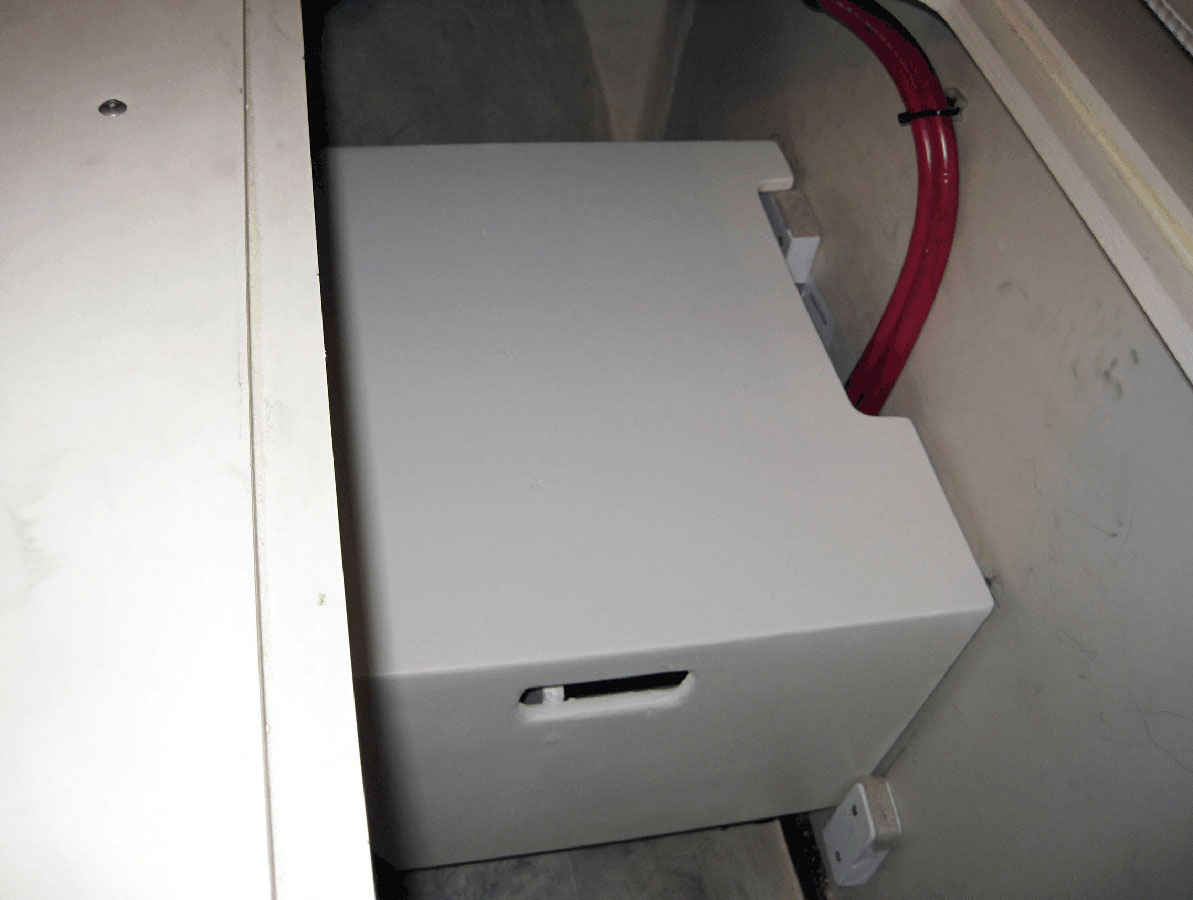
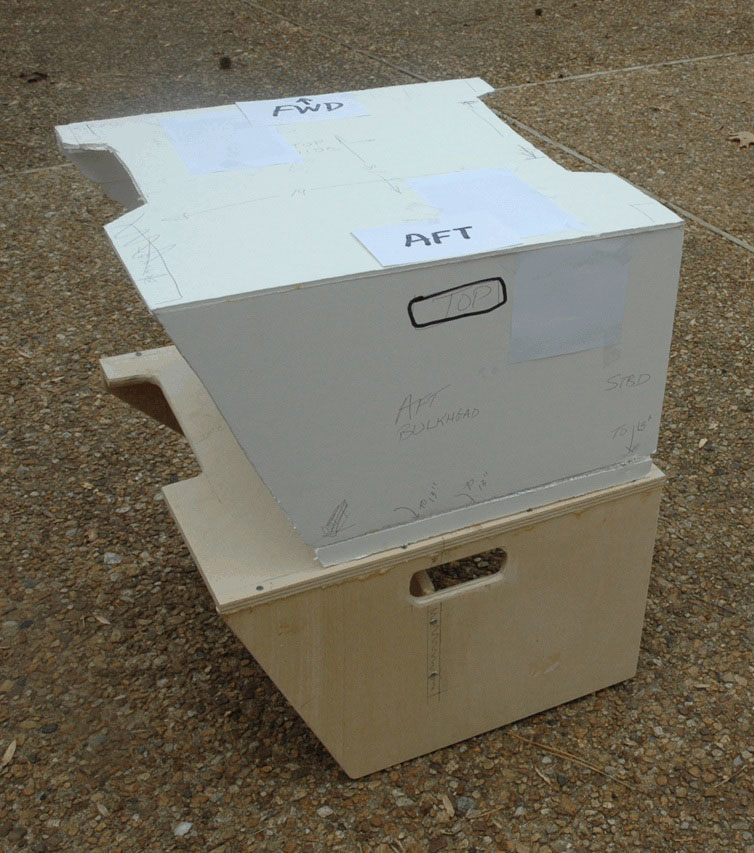
So, to utilize the storage with peace of mind, I fabricated a simple cover which protects the
motor and the lube jar.
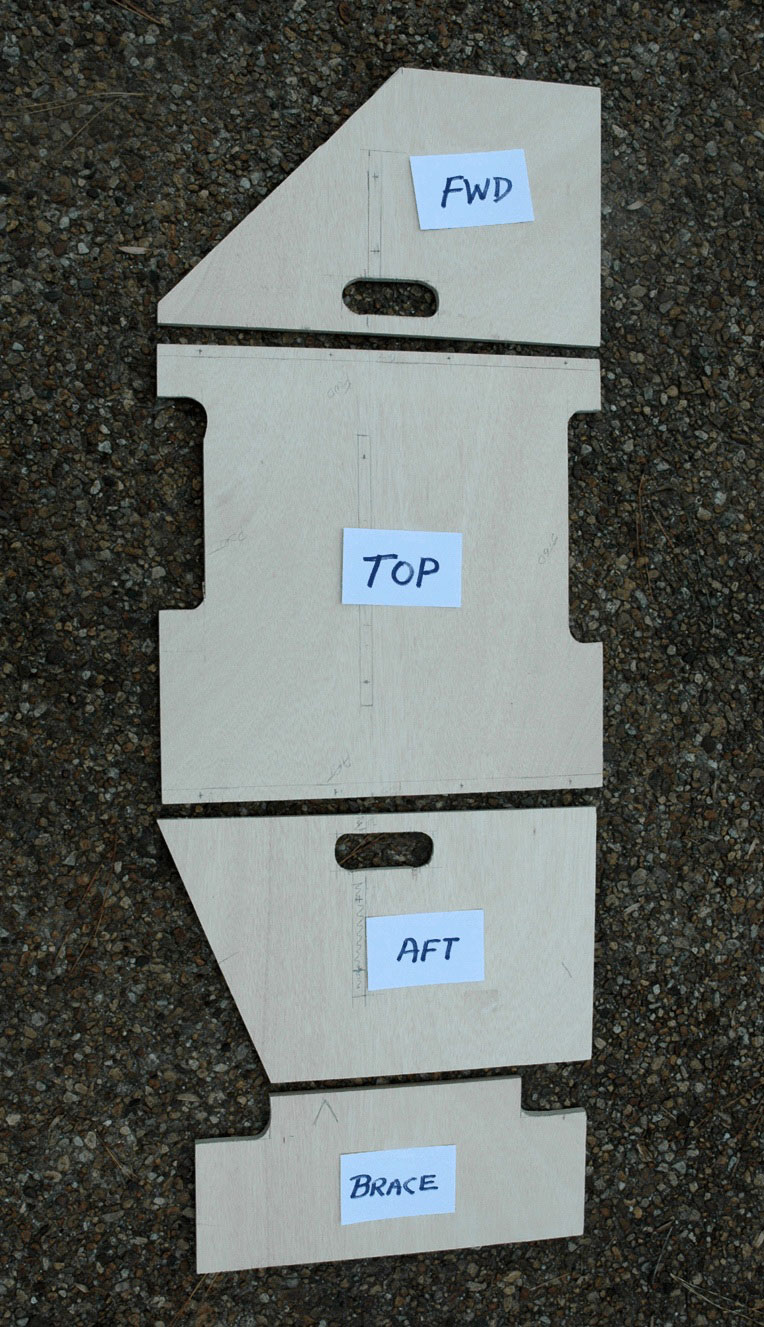
It was made from a 2 x 4 sheet of ½ inch plywood. The nice thing about this material is that if you lay out the job correctly, the lumber yard will do the precision right angle cutting of the four major pieces at no additional cost. All you need to do next, is to cut the custom edges to fit the hull contour and the power cable cutouts, assemble with glue and screws and finish with a nice coat of paint.
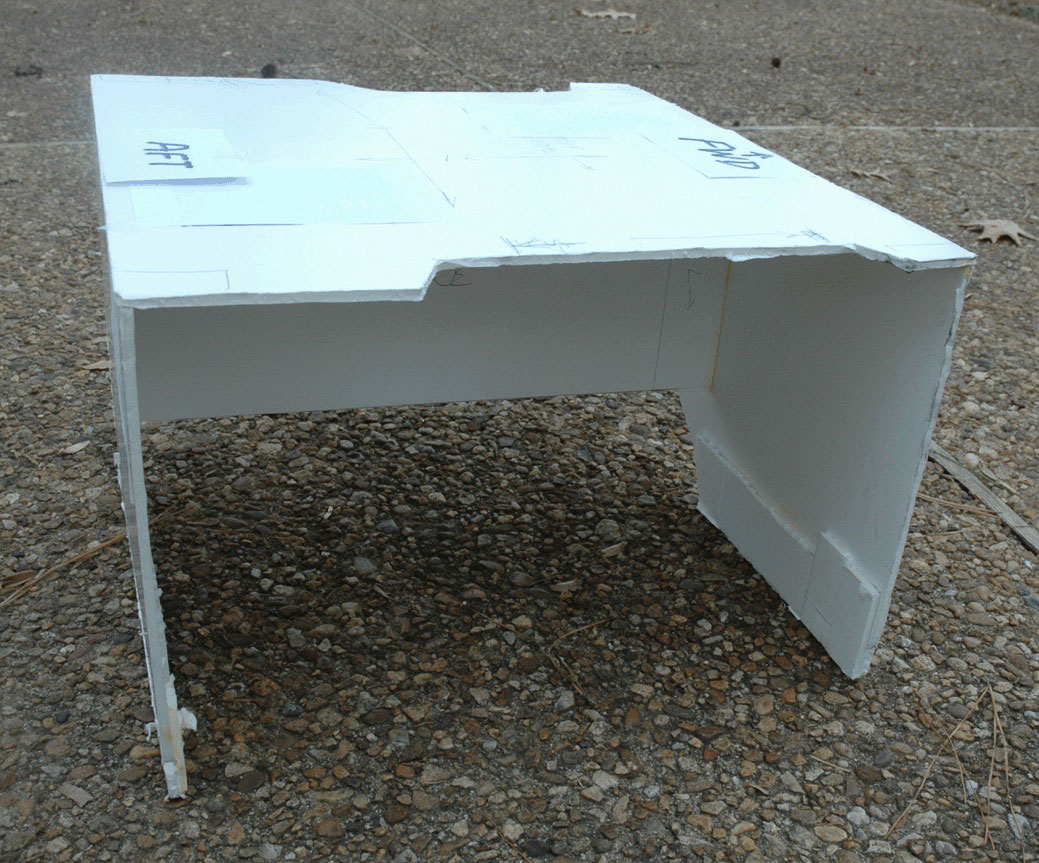
Since the hull contour is irregular, I constructed a full size mock-up of foam board obtained from an office supply or hobby store. This enabled me to experiment with various cuts until I got the fit I wanted. I left about 3 inches clear on the bottom for air circulation and cut a couple of hand holds to make it easy to lift out when needed. These also help the air circulation.
Blocks, about 1 x 3 inches (marine board) were screwed to the boat’s plywood structure to hold the cover off the bottom of the storage deck to provide the desired clearance. Strips of selfadhesive felt “blanket” were applied to the mating surfaces to make a snug fit and avoid rattles. The following illustrations show “before” and “after.”
|